Build Inspiration
Having had such a good time with my last mask build, I was looking forward to the Carrack’s annual fundraising event, the Muse Masquerade. It provided an excellent reason for me to continue exploring mask making.
The theme I went with for the 2017 event came from my very own muse, who suggested that we could go as the Owl and the Pussycat, but with a steampunk twist. If you aren’t familiar with the poem, The Owl and the Pussycat, you can read it here.
Research and Technical Background
With the Jack Skellington mask build, I identified a few things about what I wanted to keep and change with this next mask.
Sticking with the methods found on the Ultimate Paper Mache resource (and the accompanying book) were foundational. The lightness and strength of the previous mask were excellent and the materials were pretty easy to work with.
The things I wanted to change were:
-
Build the mask on a mold of my face for a better fitting shape. The comparatively flat ball that I built the first one on made for an uncomfortable evening.
-
Plan the size of the mask so that it ended at a more natural place on my face, rather than right on my mouth.
-
Switch to Super Sculpey for modeling, rather than the air dry clay I’d used, previously. This was in the hope of material reuse and better release from the paper mache.
As for research, I spent a lot of time on Google image search looking for things in the categories of “owl”, “steampunk”, and “steampunk owl”. There’s more on that last one than you might expect, though most of them are sculptures or wall hangings.
After the online photo and art research and a trip to the grown-up costume bins in the garage, it came down to needing a mask and a vest. Which brings me to the last point of research.
This project required a great many feathers. I found a variety of sources for them, from generic, dyed, craft feathers to really fancy, tropical bird specimen feathers. It was interesting to learn about the industry and the kinds of birds used for fashion feathers. One trend that I liked was that most of the really fancy feathers were said to be gathered from moltings of live birds. I’m sure that this is an abused marketing tactic, but I do think that a number of the sources seemed genuine. Long pheasant tail feathers were one of the products that this was most commonly seen with. There were many photos and videos of these birds living in places where their feathers could be harvested.
Method
Mask
Creating a Mask Form
Following the procedure described in my masks book, I formed a sheet of aluminum foil around my head and gently pressed it inward to form an impression of my face. From there, I applied small strips of duct tape all over, to help the foil hold its shape. Once the mold of my face was pretty stable, I carefully smoothed the interior and applied a petroleum jelly release.

Form of my face
Strips of plaster cloth were wetted and placed inside the mold in 2-3 layers. Once cured, the plaster form was removed from the mold and allowed to completely dry. A layer of shop towel paper mache was applied over the form for better texture and rigidity. Paper mache paste was applied inside to better seal the plaster cloth. After some sanding, another layer of paper mache finished the form.
The purpose of this form was to allow me a rigid and fitted base on which to sculpt the details of the mask.
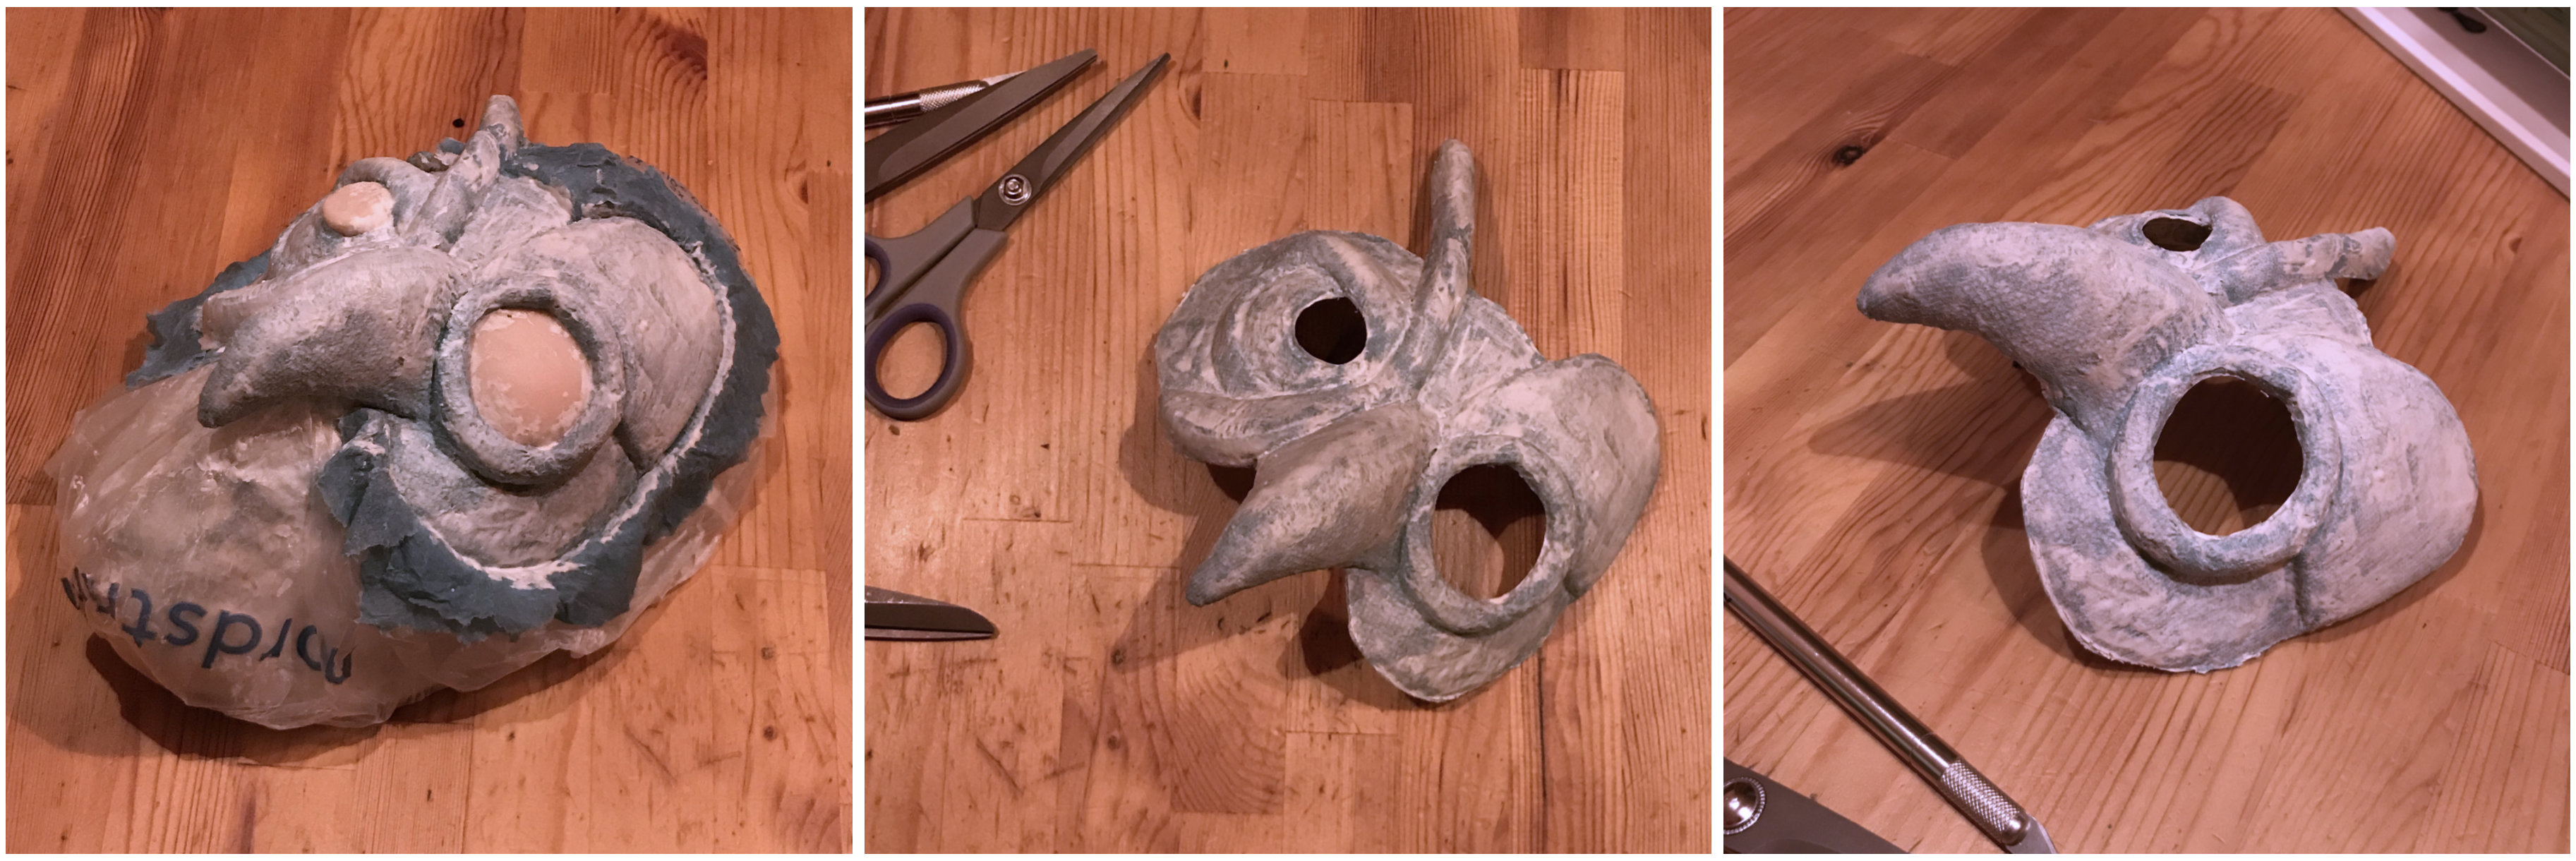
Sculpting
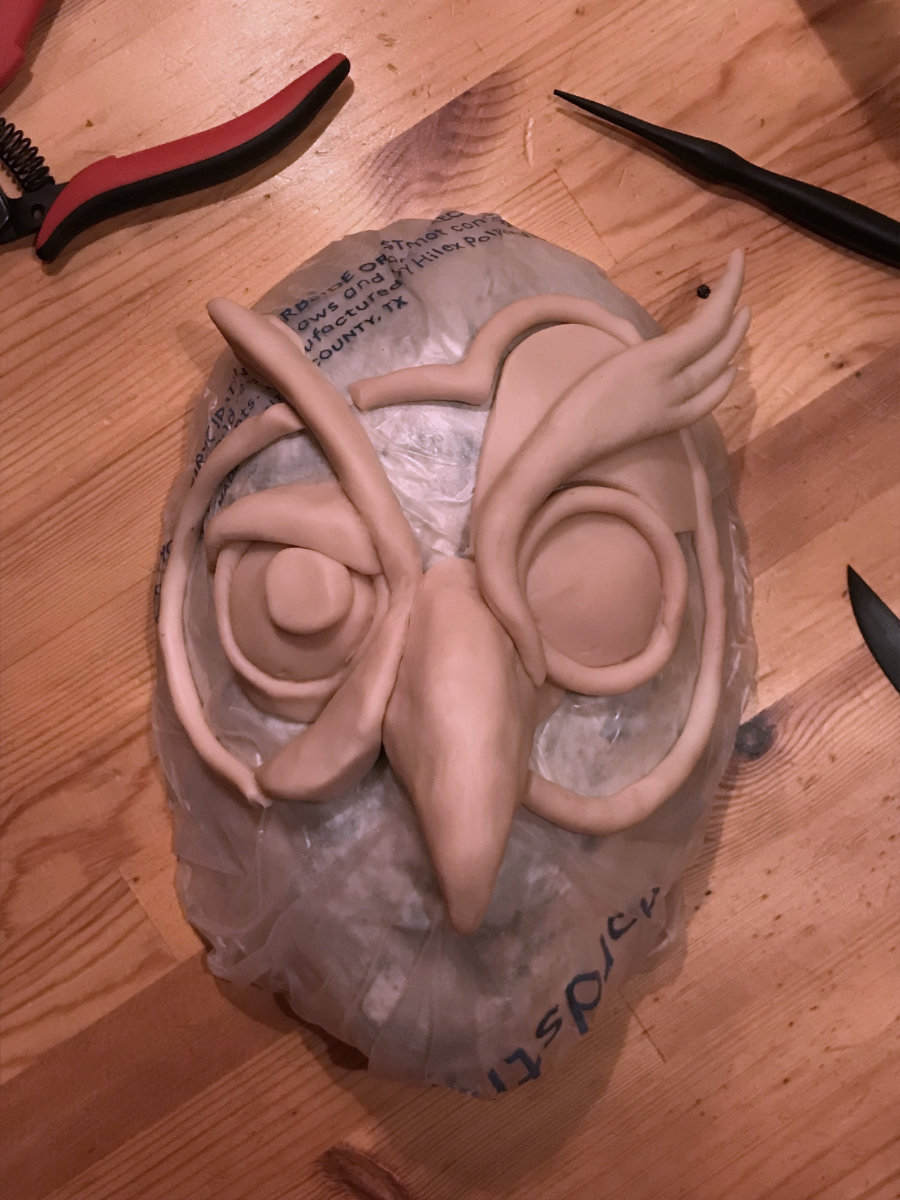
Sculpted mask elements
I knew I wanted the mask to be in two halves. One side of the mask would be decorated as a natural owl and the other side mechanical - or at least look like it. Steampunk-owl-cyborg was the goal here.
One thing I learned quickly was that Super Sculpey required a lot more handling to be workable and was more effort to move, but resulted in a much more refined surface and shape, since things happened more gradually. The first thing I did was to lay down some coils of the clay to define the outer edges of the mask.
The “Eyebrow” feather was sculpted around some folded twist ties. I think this actually made it less stable - as it wasn’t rigid at all and the sculpey didn’t adhere to it. The feather was initially fitted to the form for the paper mache. Later it had to be altered to suit the finished shape and size of the mask. After baking to set the form, it was sanded, cleaned, painted, accidentally dropped, and glued back together for a resulting look that was more used and weathered than I’d intended. In the end, the rough treatment made for a better feel.
Paper Mache
Laying down the paper mache was pretty much as it was with the previous mask. The highlights being that it was important to tear the edges of the shop towels and to stretch them over the sculpted mold, so that they conformed well to the shapes I had created with the sculpey.
Paper mache process
Finishing
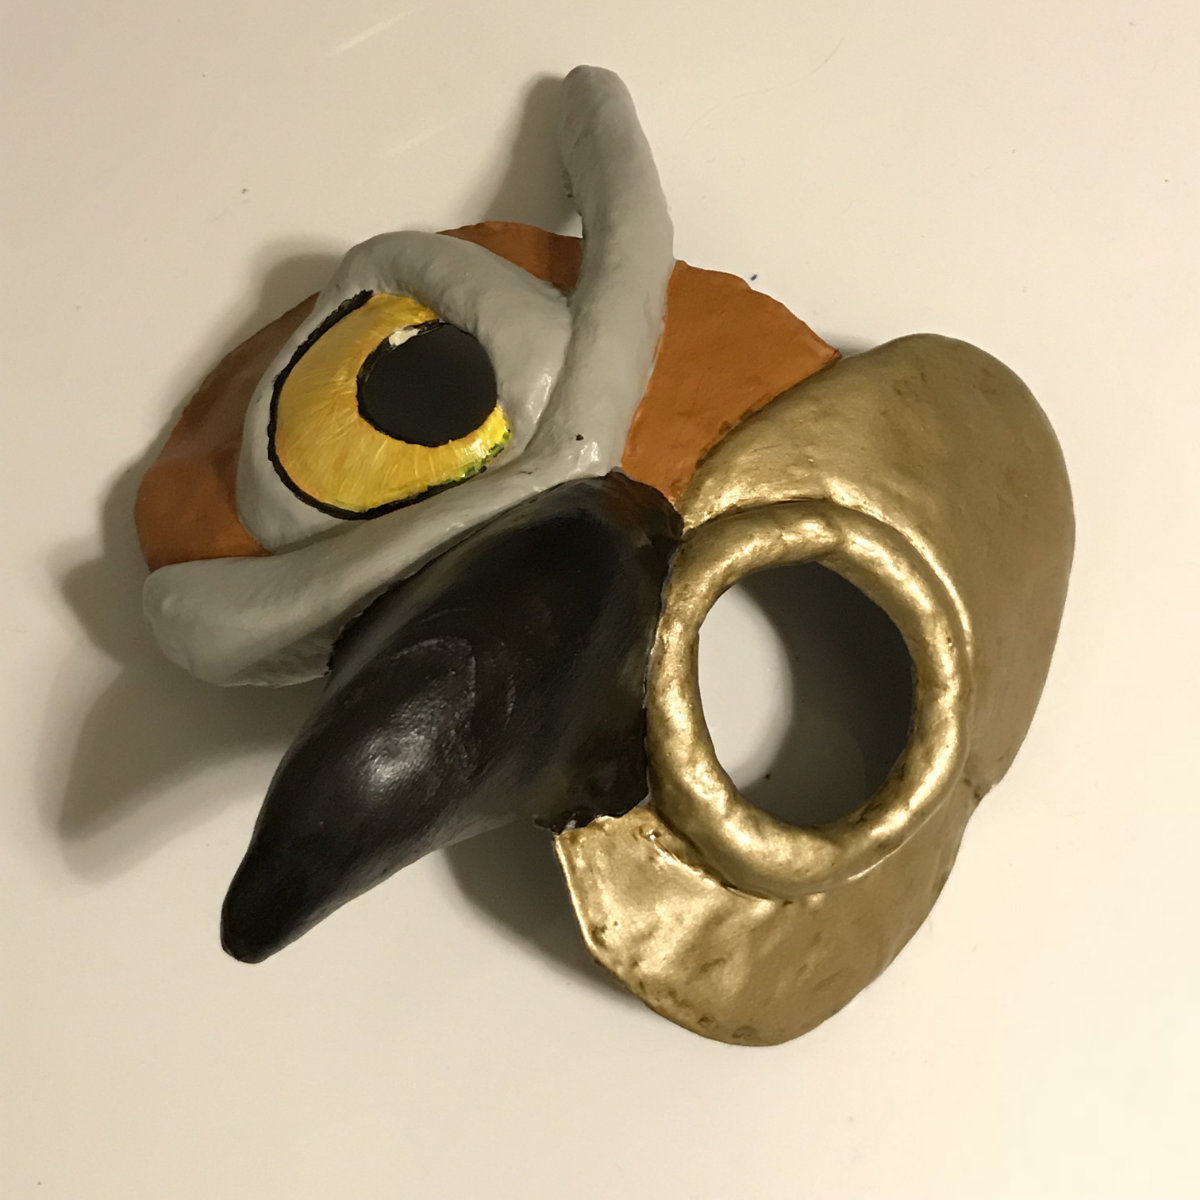
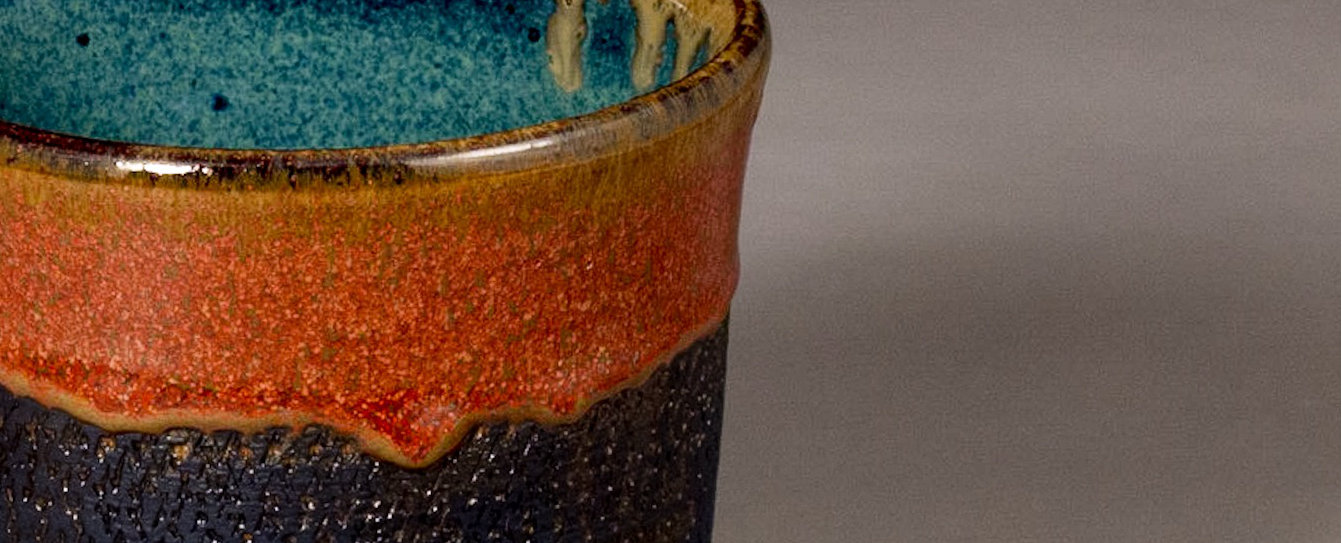
Painted mask
Standard sanding of the paper mache coating to knock of the points and some of the unwanted texture was followed by cleaning and a base layer of paint. The painting work on this mask was more elaborate that my previous one. In addition to a base coat of medium gray acrylic on the front and black on the inside of the mask, I did some decorative painting, as well.
For the natural side of the owl, the eye and the subtle texture of the beak were the most interesting. Most of the rest of that side of the mask was to be feathered, but those parts would be exposed. I wanted to make sure that the eye shined, so I used a glossy spray varnish after the paint went down.
On the other side of the mask, I sprayed it with a rattle can of gold toned metallic paint, then applied a weathering effect. This was accomplished with brown and dark grey acrylic craft paint applied over the sprayed on brassy paint. The darker paint was wiped off with a barely damp paper towel, leaving some in the crevices and corners.

Finished mask
The eyebrow feather was distressed with a modeling tool (and then dropped, see above). It was painted with a bronze, metallic craft paint. This piece was attached with hot glue after the main body of the mask had been painted and varnished. I was worried that it might not hold on the glossy varnish, but it was a good bond. It did add quite a bit of weight to the mask, though.
Next came the feathers. I used a variety of ones that I had ordered and ones I picked up from the craft store, mostly the latter. These were attached over the varnished surface of the mask with hot glue. Some of them were tricky to keep from matting into the glue and had to be reapplied a couple of times. Overall, I think they really helped solidify the organic feel that I wanted for this side of the mask.
On the machine side of things, I applied a few gears to the mask, but honestly, I had run out of time and didn’t get to do nearly enough to give it a mechanical feel, which was disappointing. Finally, I used the lens from a cheap pair of mirrored, green sunglasses for the cyborg eye covering. The look from this was great and the thin lens trimmed easily with a pair of tin snips. It was simply hot glued from the inside. The final image makes it look very blue, but in reality it’s a peacock-like shade of green.
Vest
Base Garment
Continuing on with a steampunk theme, I decided a vest and white oxford would be appropriate with some brown pants to go along with the owl color scheme. My partner in crime and costumes sourced a vest from a local thrift shop. Nothing special. It had pockets so that I could have a watch chain.
Feathers. So Many Feathers
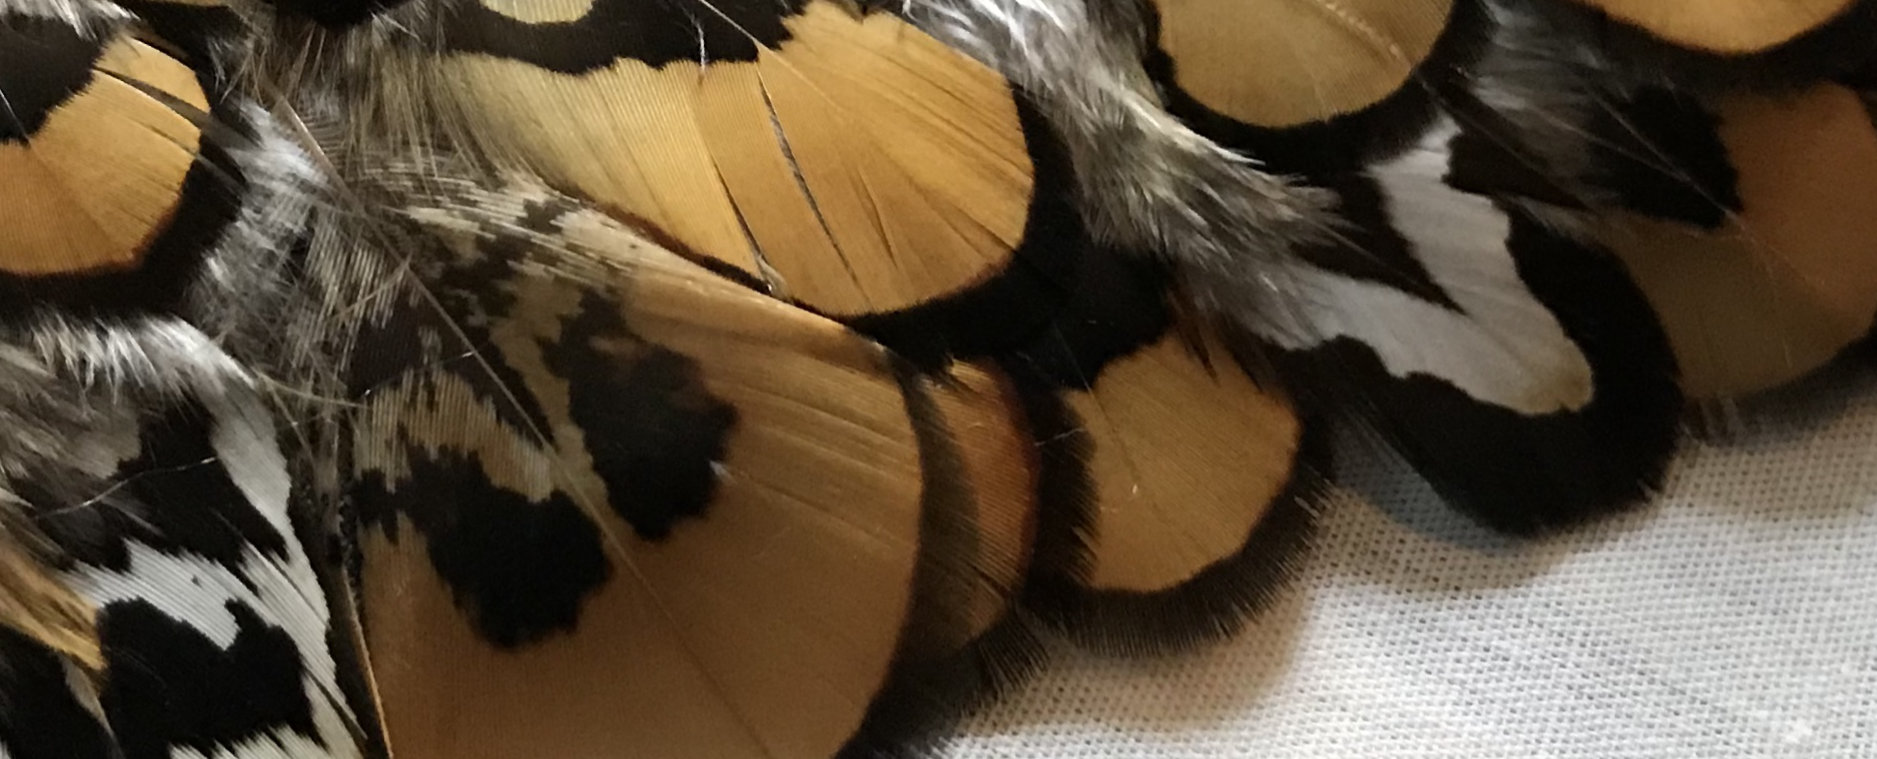
To really put the owl into my costume, I decided to cover the vest in feathers. I purchased 1/4 pound of feathers from Moonlight Feathers. It didn’t sound like a lot to me, but after comparing the various products, that’s what I went with. In this case, they were golden pheasant feathers, without any of the showy tail feathers.
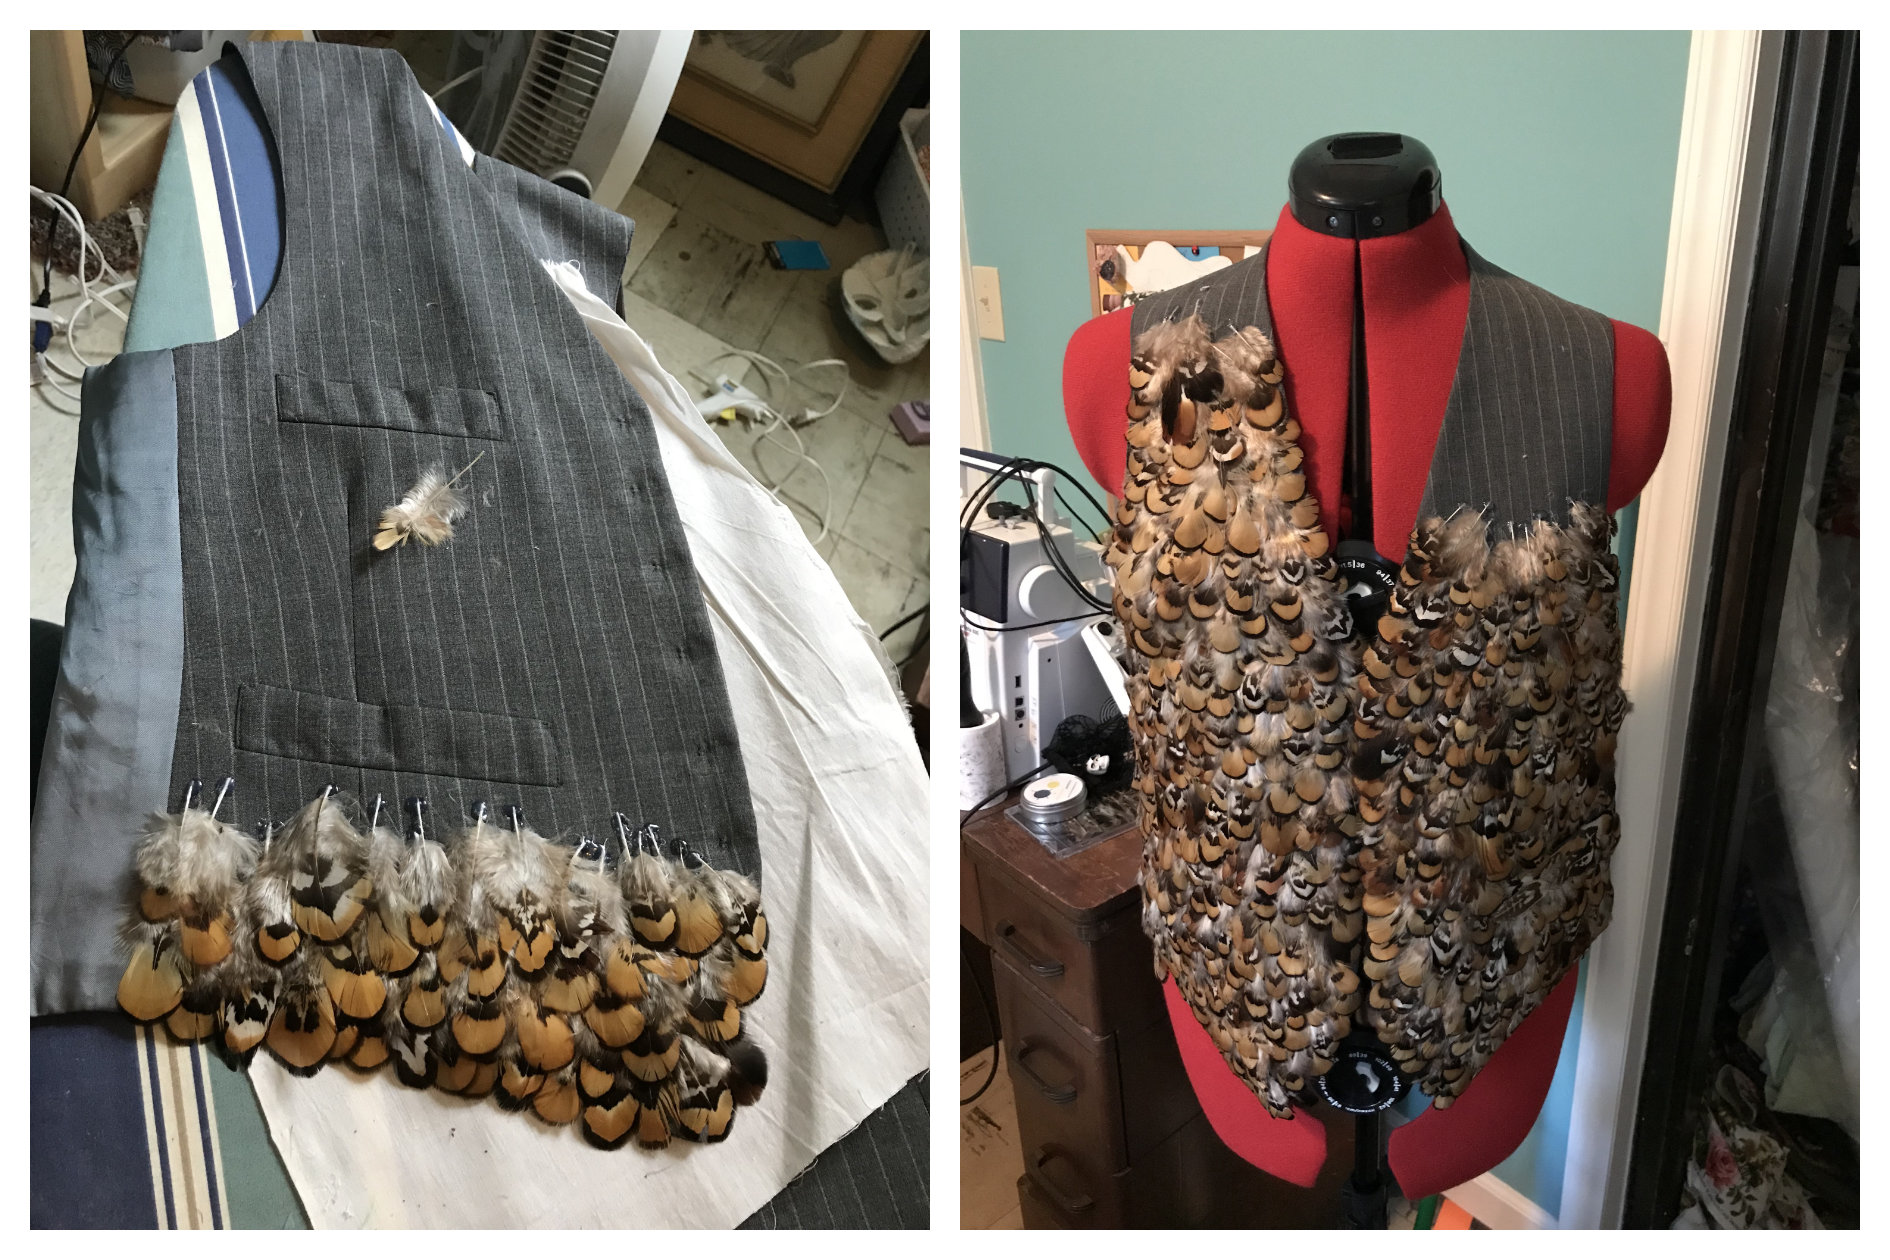
Vest Construction
It turns out that this is a LOT of feathers. Also, there was a LOT of sorting that had to be done on this mixed bag of feathers. Damaged feathers needed culling. Clusters of feathers needed to separating. The size variation was from almost 3" long down to about 1/2" long. Then there was the task to trying to make sure that there was some color and shape consistency, as these had clearly come from all over the bird and shapes and textures were highly variable. In all, I learned a lot about working with feathers and I breathed an unbelievable amount of down. Despite the time required for feather sorting, it was quite helpful to have a wide variety of shapes and sizes to use on different parts to the vest. Curved feathers for shoulders, smaller feathers to fill gaps.
In between feather sorting sessions, I would attach the sorted ones onto the vest. This was done with a hot glue gun onto the fabric of the vest. Initially, I worked with the vest on a flat table, then on a dressmaker’s dummy for top half, so that the feathers laid appropriately when the vest was curved over my chest and shoulders. Feathers were laid from the bottom up and from the outside edges inward. This allowed me to conceal the glued-down feather shafts. The last few feathers required some creative gluing to keep everything looking nice.
I’m not sure what to say about this part of the project. It wasn’t complicated, there aren’t many tricks, but it took a long time to glue the individual feathers to the wool vest.
Final Thoughts
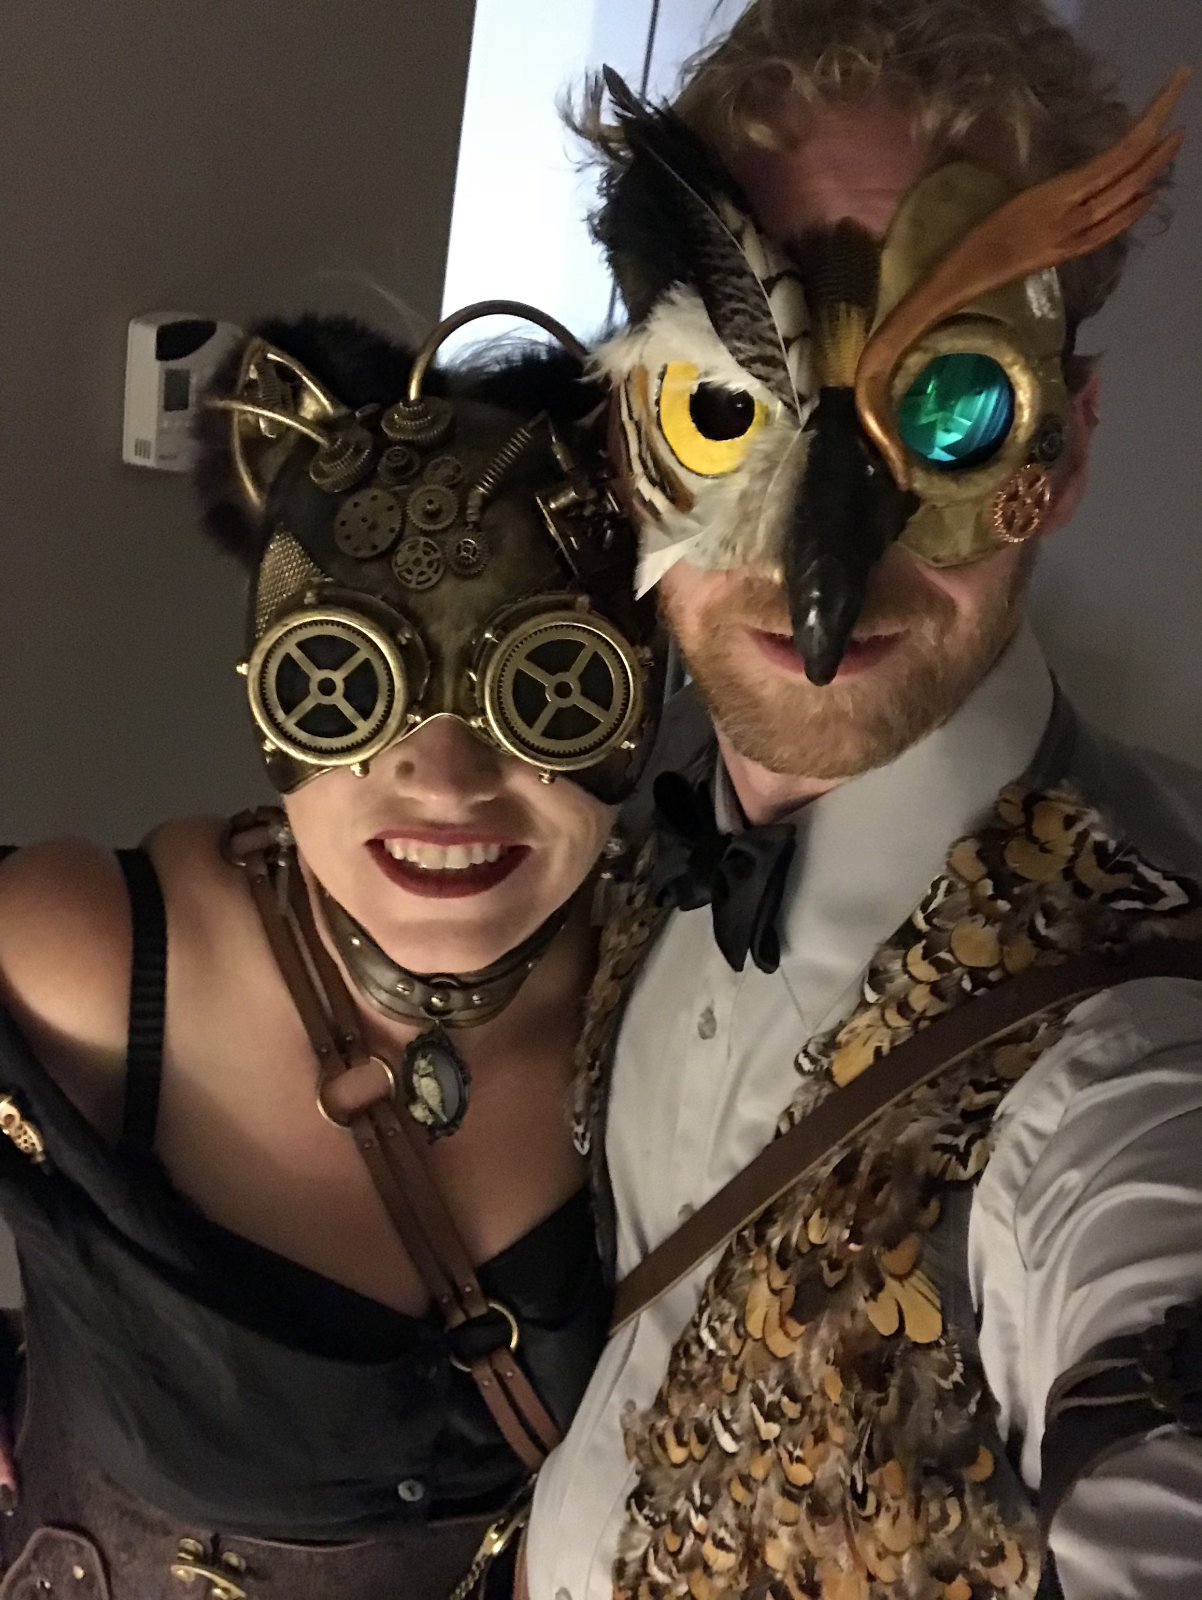
Owl AND Pussycat
Last touches to this costume included a ukulele on a leather strap and small bands on each of my upper arms. A white shirt under the vest with brown, wool pants and brown, brogue shoes completed the look. Overall, it was reasonable to wear, though the feathers on the vest were pretty disheveled by the end of the evening.
Probably the most critical part of the costume was the Pussycat to go with my Owl (who you can see here).
Share this post
Twitter
Reddit
LinkedIn
Pinterest
Email